
If you are using ServiceNow as your IT service management platform, you might want to make your itemize items searchable in Microsoft Search.
Microsoft Search is a unified search wits that helps you find what you need wideness your organization, including files, sites, people, and more. By connecting your ServiceNow itemize items to Microsoft Search, you can enable your users to find and request them directly from the Microsoft 365 apps.
In this blog post, we will show you how to configure ServiceNow itemize items as a data source for Microsoft Search using the Microsoft Graph connector. The Microsoft Graph connector for ServiceNow itemize items allows you to alphabetize your itemize items and their properties, such as name, description, category, and availability. You can moreover wield filters and refinements to your itemize items to make them increasingly relevant and discoverable for your users.
To configure ServiceNow itemize items for Microsoft Search, you will need the pursuit prerequisites:
A Microsoft 365 tenant with Microsoft Search enabled.
A ServiceNow instance with itemize items that you want to make searchable.
An admin worth for both Microsoft 365 and ServiceNow.
Once you have the prerequisites, you can follow these steps to configure ServiceNow itemize items for Microsoft Search:
Step 1: Create a data source in Microsoft 365 Admin Center
The first step is to create a data source in the Microsoft 365 Admin Center that will connect to your ServiceNow instance and alphabetize your itemize items. To do this, follow these steps:
Go to Microsoft 365 Admin Center – https://admin.microsoft.com/
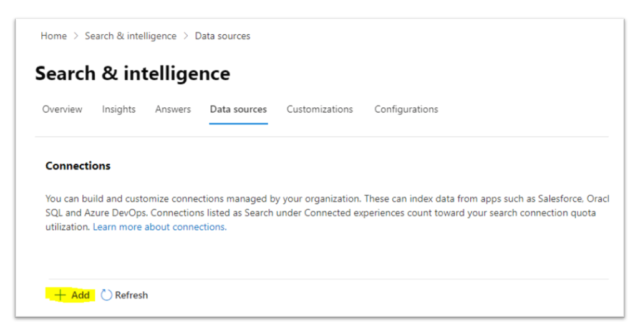
Navigate to “Settings” > Search & Intelligence > Data Sources
Click “Add”
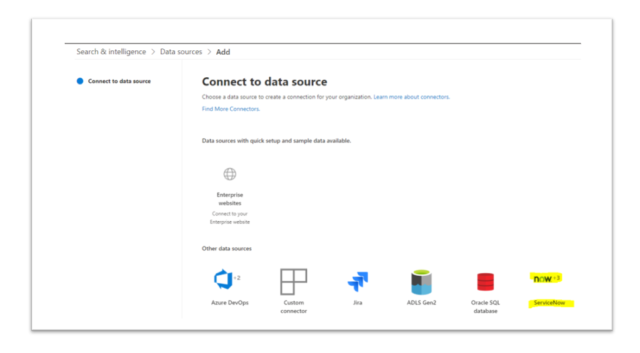
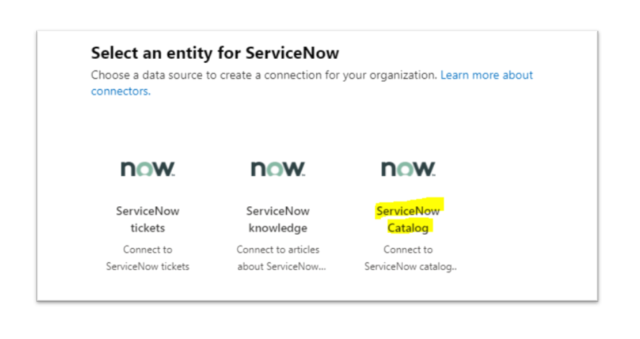
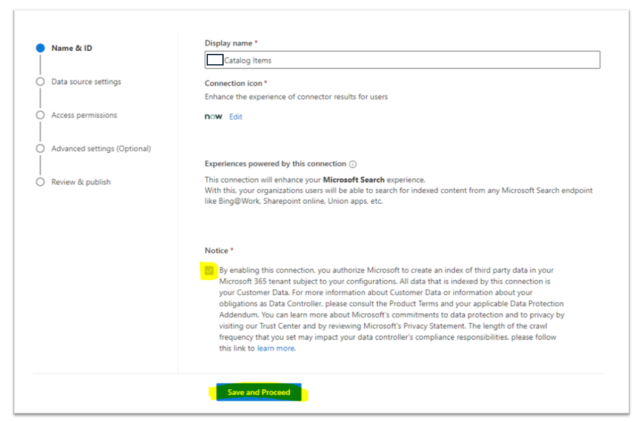
- “ServiceNow Catalog” should be selected.
- Complete Name, Display name, Description, and Upload logo fields.
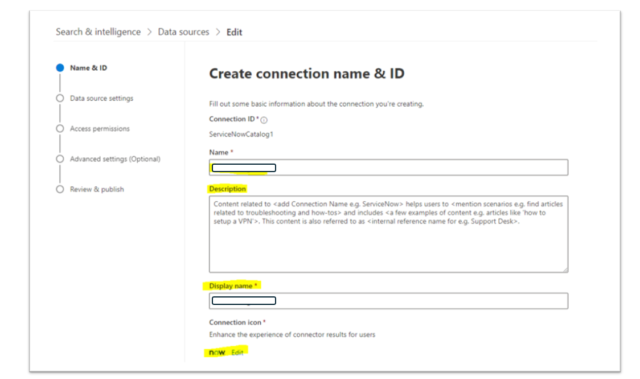
- Navigate downward. After checking the “Notice” box, click “Save and Proceed.”
Step 2: Set up the authentication and connection details.
Setting up your ServiceNow instance’s authentication and connection details is the next step. To accomplish this, include the following details:
URL for a ServiceNow instance
Choose the kind of authentication: OAuth Client ID and Client Secret for ServiceNow
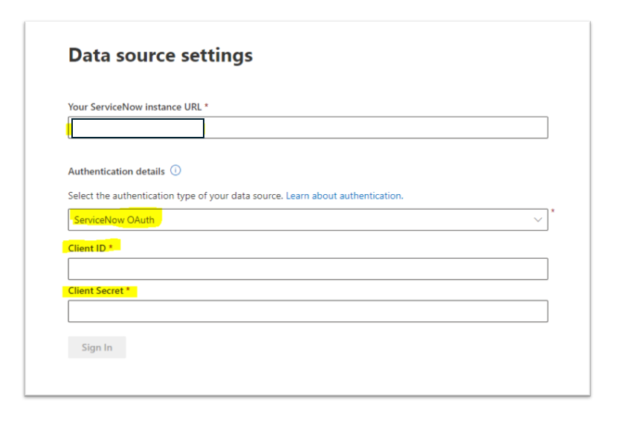
- When you click “Sign in,” the notification “Connection Successful” appears.
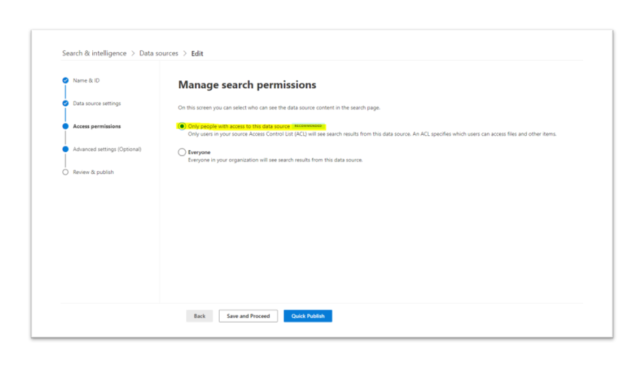
Pick the option “Only people with access to this data Source.”
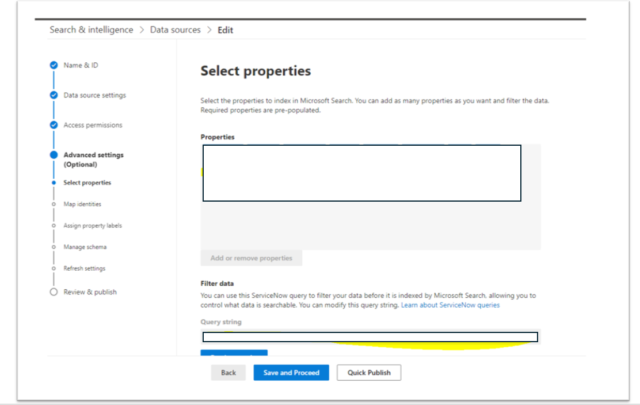
Step 3: Set up the query string and properties
Setting up the properties and query string for your catalog items is the next step. The metadata fields known as properties are what Microsoft Search will index and show for your catalog entries. The filter that will be applied to your catalog items to restrict the data source’s reach is the query string. Take these actions to accomplish this:
Verify that this section contains every property that is required. As needed, you can add or remove properties.
Utilize the required “Query string” to refine your information.
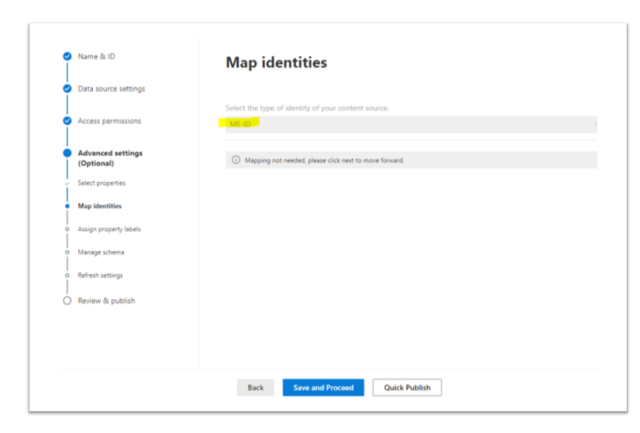
- Choose “ME-ID” – The connector transfers user email addresses that are collected from ServiceNow to UPN properties from Microsoft Entra ID if you select Microsoft Entra ID as the identity source type.
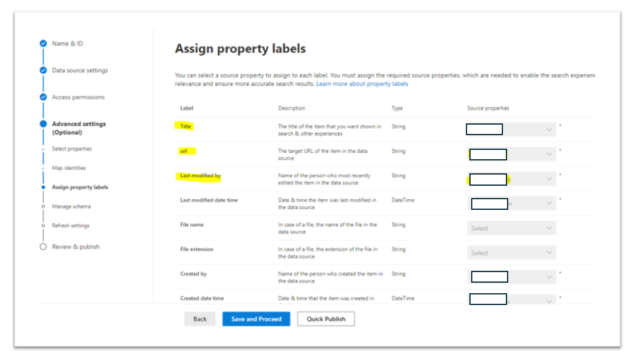
- Assign Property Labels: You have the ability to give your source properties meaningful labels. You have the option to modify the pre-selected characteristics on this page if you believe an alternative attribute would be more appropriate for a given label, which is dependent on your data source.
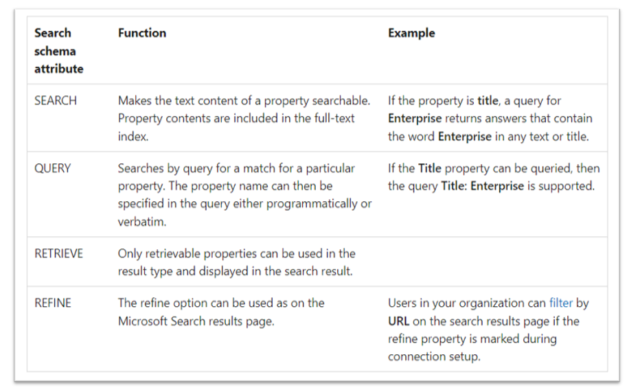
- Manage schema: Each source property’s search capabilities can be adjusted by setting the search schema attributes. What information end users can read and access, as well as the results that appear on the search results page, are determined in part by a search schema.
Query, Search, and Retrieve options are among the search schema attributes.
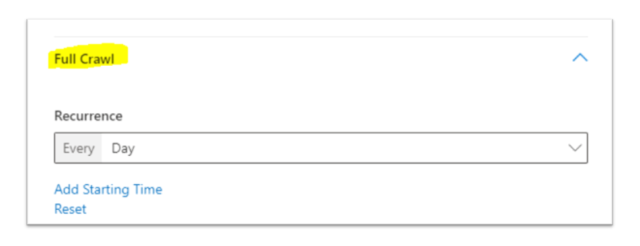
Step 4: Set up the crawl timetable
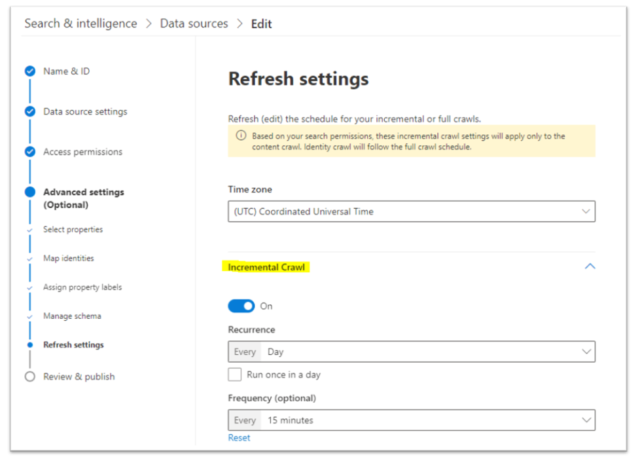
Setting up the crawl schedule for your data source is the fourth step. The frequency with which Microsoft Search updates your catalog items is determined by the crawl schedule. There is an incremental crawl and a complete crawl option. A full crawl will index every catalog item in your data source, whereas an incremental crawl will only index the changes made since the last crawl. Take these actions to accomplish this:
- Establish a timetable for your partial and thorough crawls.
Note: If you would like to have filters in Verticals, you will need to make properties refinable because you cannot change this once Connection is configured. (I had to reconfigure the entire connection to discover this the hard way.)
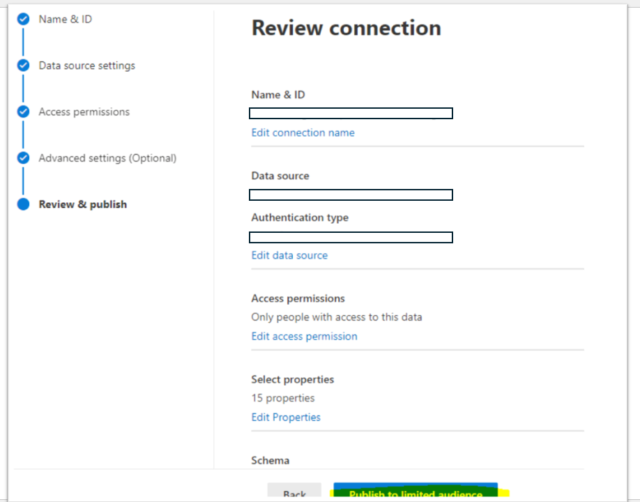
Step 5: Examine and make available your data source
Reviewing and publishing your data source is the last step. In addition to checking the connection status, you can preview a few of the catalog entries that will be indexed. Before making your data source public to everyone in your company, you may also publish it to a small audience for testing purposes. Take these actions to accomplish this:
You can add users’ names who can access ServiceNow search results in Microsoft Search here and choose to “Publish to limited audience.”
Best wishes! The ServiceNow catalog items have been set up for Microsoft Search successfully. Your users can now use any Microsoft 365 app that supports Microsoft Search to find and request them. Additionally, you can design unique verticals and result formats to personalize how your catalog items are searched.
servicenow, servicenow share price, servicenow developer, servicenow stock price, now learning servicenow, servicenow interview questions, servicenow developer instance, what is servicenow, servicenow stock, servicenow careers.
you may be intersted in this blog here:-